
Creating visually appealing and professional designs is made easy with Canva, even if you’re not a design guru. One of the most powerful tools in Canva’s arsenal is the Canva snap-to-grid feature. This simple yet effective tool can help you achieve pixel-perfect precision in your layouts, ensuring that your elements are perfectly aligned and spaced. Whether you’re designing a social media graphic, a presentation, or even a printed brochure, understanding how to use Canva’s snap-to-grid can elevate your design game.
What is Canva Snap-to-Grid?
In essence, Canva snap-to-grid is like having a magnetic ruler for your designs. It overlays a grid on your canvas, and as you move elements, they “snap” to the nearest gridline. This takes the guesswork out of alignment and spacing, allowing you to create clean, organized designs with ease.
Why Use Canva Snap-to-Grid?
You might be wondering why you should bother with a grid when Canva already offers alignment guides. Here’s where the magic of snap-to-grid shines:
- Pixel-Perfect Precision: Achieve that polished, professional look by ensuring every element is perfectly aligned.
- Consistent Spacing: Maintain visual harmony by effortlessly creating equal spacing between elements.
- Faster Design Workflow: Spend less time fiddling with alignment and more time on the creative aspects of your design.
- Improved Visual Hierarchy: Guide the viewer’s eye through your design by strategically aligning elements using the grid.
How to Enable Snap-to-Grid in Canva
Ready to unlock the power of snap-to-grid? Here’s how:

Step 1: Open Your Design
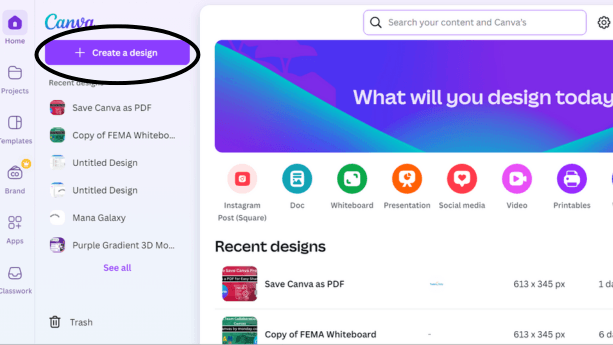
Navigate to your Canva project or start a new one.
Step 2: Access Grid Settings
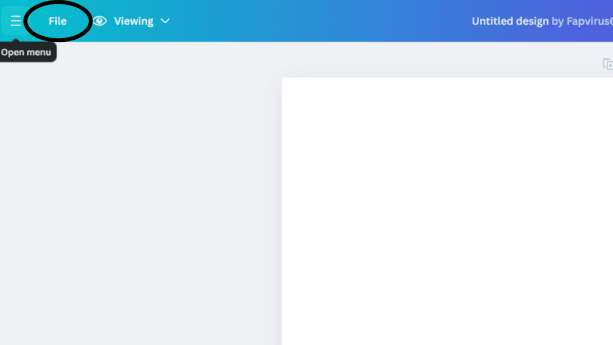
In the editor’s upper-left corner, select the “File” option.
Step 3: Enable the Grid
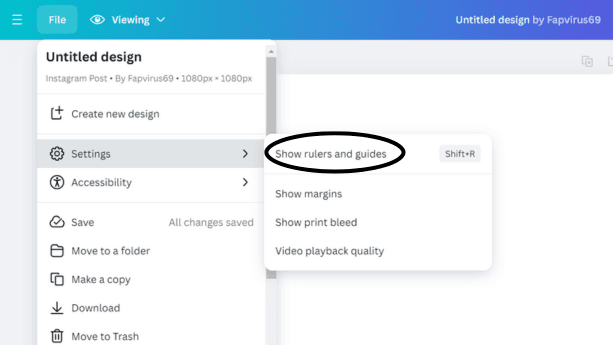
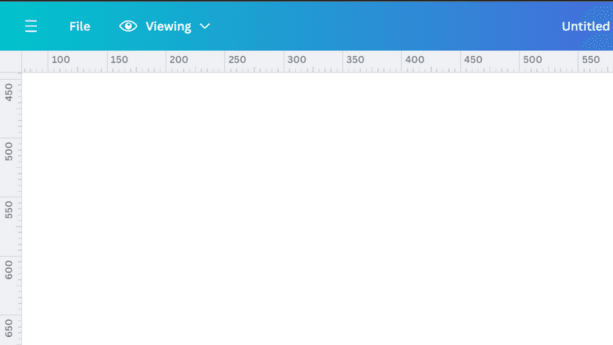
Choose “Show Rulers and Guides” from the option that appears. On your painting, you’ll see faint grid ruler appear.
Step 4: Activate Snap-to-Grid
In the same “File” dropdown menu, make sure “Snap to Grid” is also checked.

Mastering Canva Snap-to-Grid: Tips and Tricks
Now that you have snap-to-grid enabled, let’s explore some ways to maximize its potential:
- Adjusting Grid Size: You can customize the grid size to suit your design needs. Smaller grids offer finer control, while larger grids are great for bolder layouts.
- Keyboard Shortcuts: Speed up your workflow by using the arrow keys to nudge elements one grid square at a time.
- Overriding Snap-to-Grid: Hold down the “Alt” key (or “Option” key on Mac) while dragging an element to temporarily disable snapping.
- Using Grids for Backgrounds: Create visually interesting backgrounds by strategically placing elements along the gridlines.
Examples of Canva Snap-to-Grid in Action
Let’s illustrate the power of Canva snap-to-grid with some real-world examples:
- Social Media Graphics: Create eye-catching Instagram posts with perfectly aligned text and images, ensuring your message stands out.
- Presentations: Design professional slides with consistent spacing between bullet points, images, and headings for a polished presentation.
- Website Banners: Craft visually appealing banners with precisely placed call-to-action buttons and key information.
Conclusion
Anyone wishing to easily create graphics that appear professional will find Canva Snap-to-Grid to be an essential tool. Gaining proficiency with this straightforward function will enable you to increase the accuracy and control of your design process. In order to see how snap-to-grid may improve your designs, be sure to activate it the next time you use Canva.